Hello. You're one of a select few people who have one of my hardware SID players, or you're just curious.
Your player probably shipped with styrofoam pieces inside it to ensure it didn't move around too much during shipping. Remove those pieces first.
Once that's done, the main thing to check is that all the connectors are in the right spots. The worst thing that can happen to the board is that it is connected with reverse polarity (positive voltage and ground switched), or that parts which are supposed to get 3.3v or 5v get 12v.
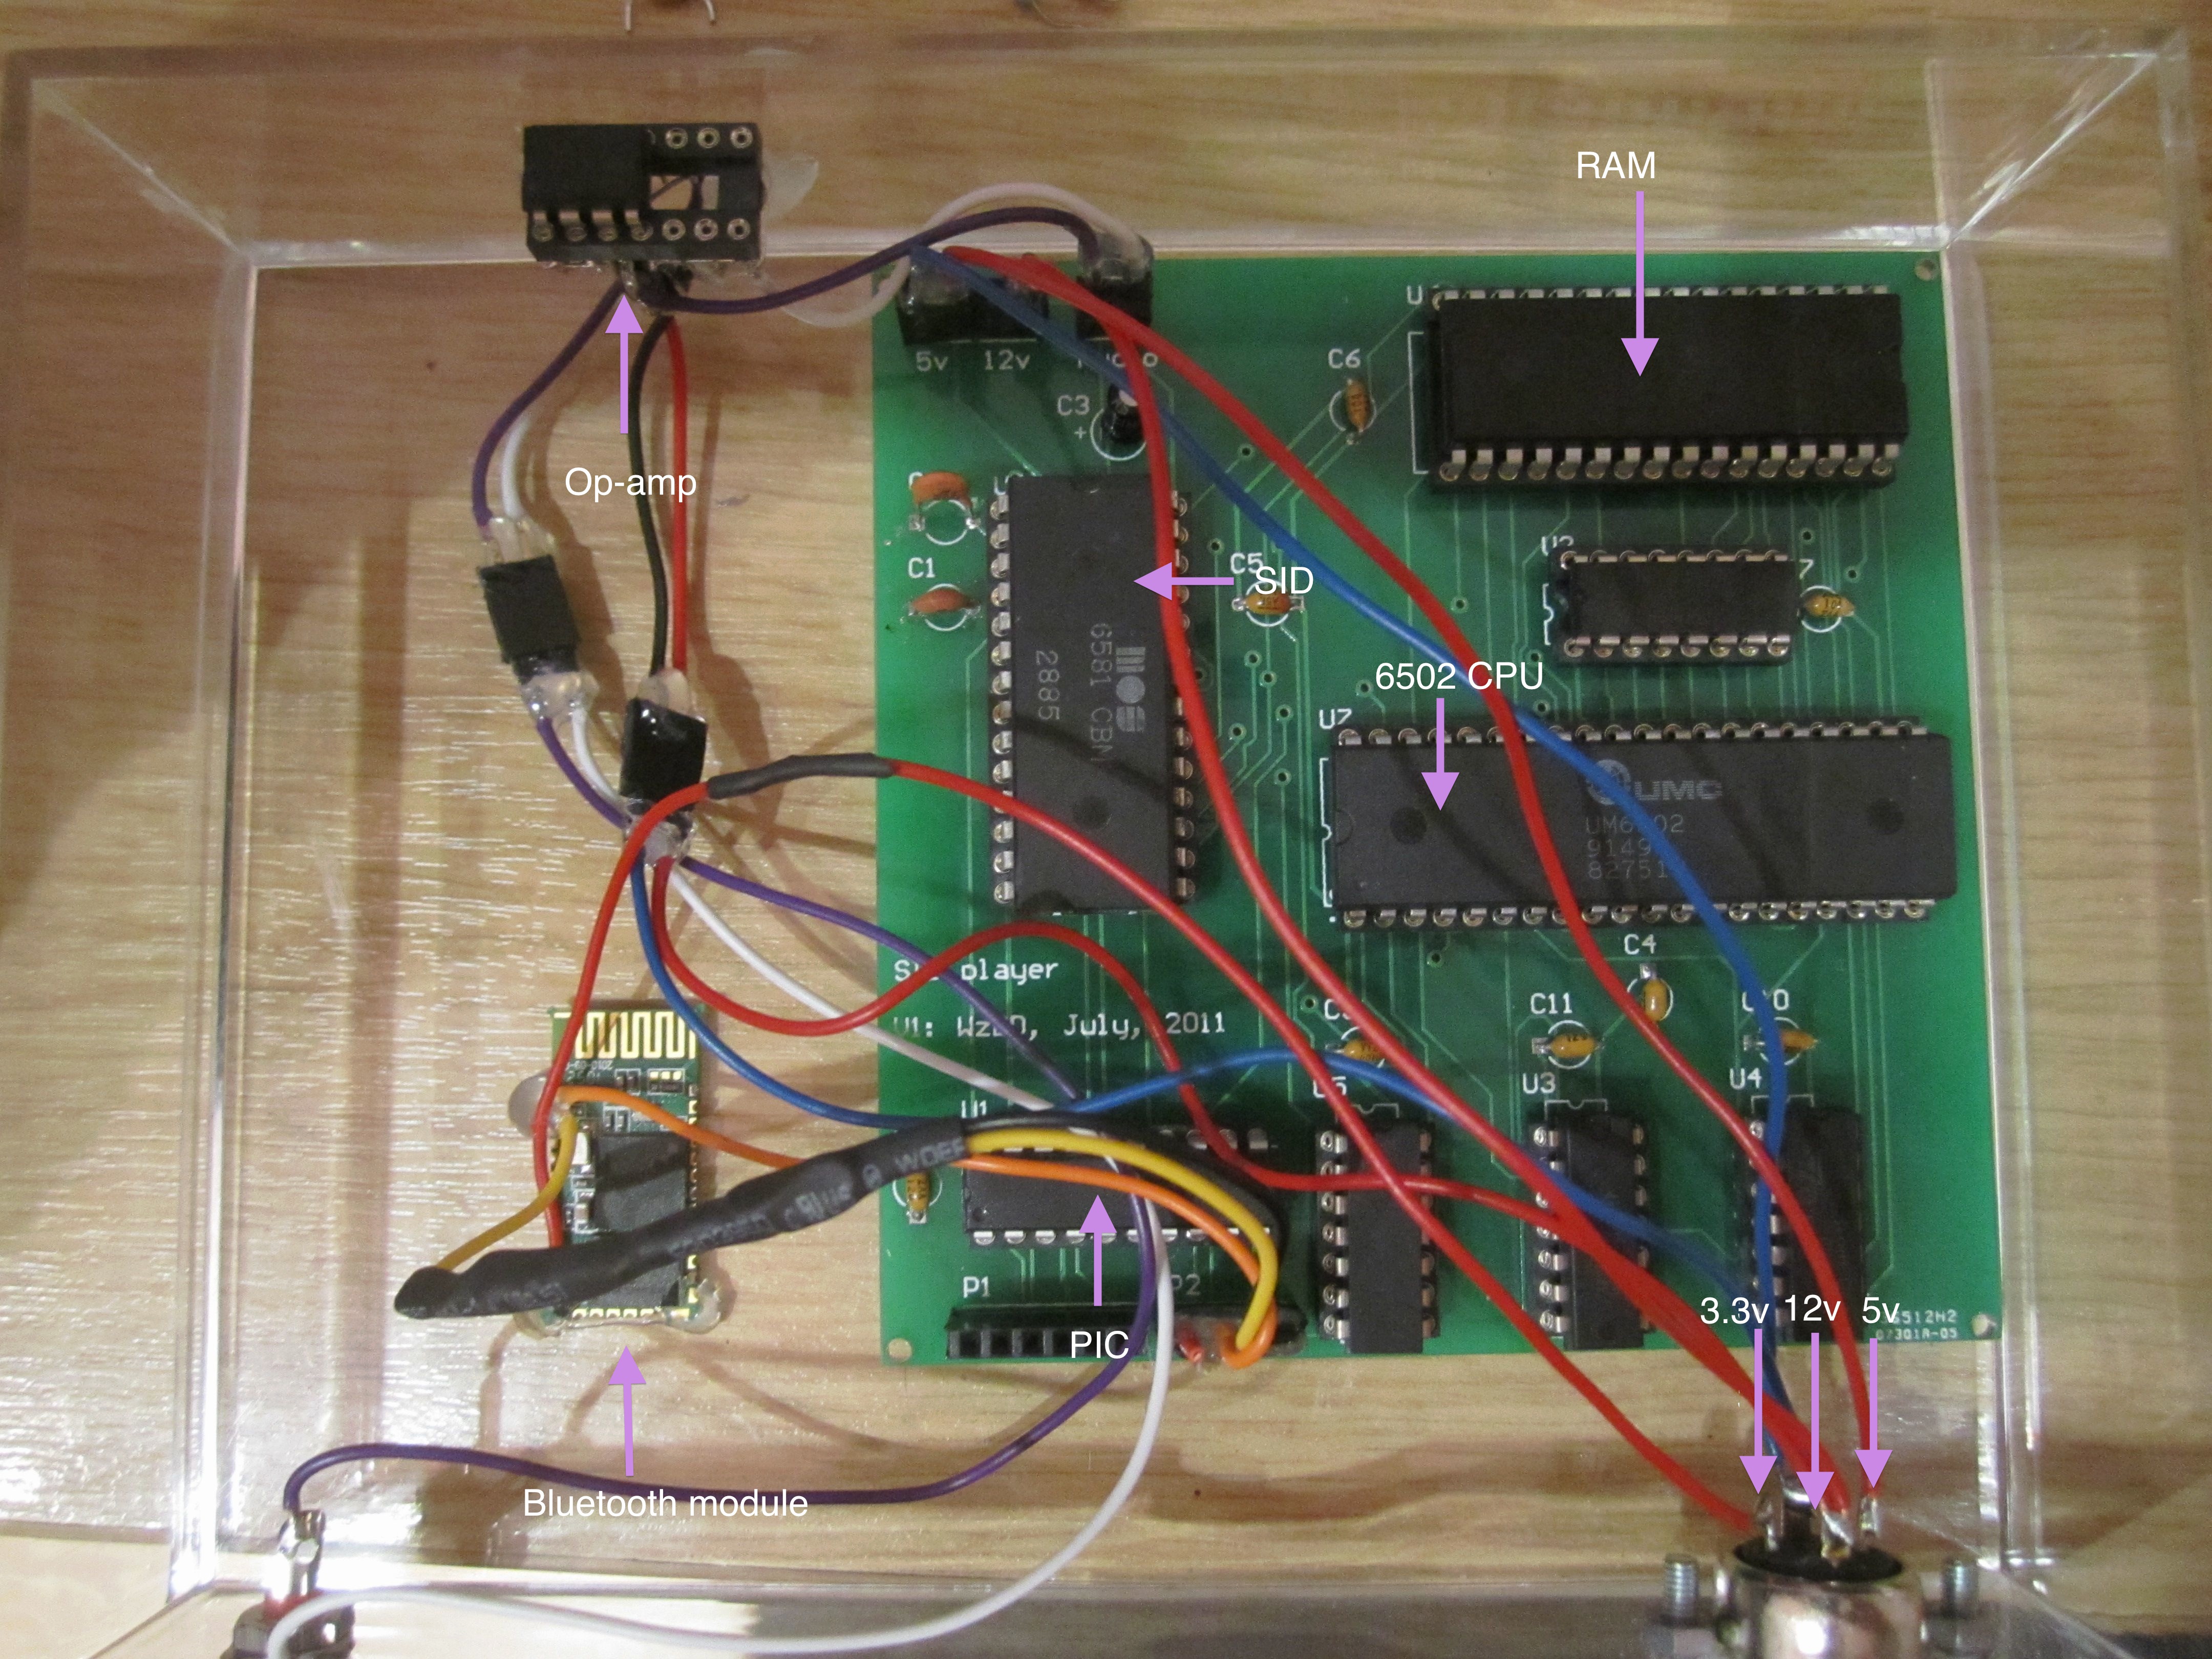
The main system looks like this. Click for a larger view:
The three main parts are the Bluetooth board, on the lower left; the amplifier; on the upper left, and the SID player, on the right. The power connector at the bottom has three positive voltage inputs: 3.3v, 12v, and 5v, from left to right, as seen from the top.
The Bluetooth module connects via a 4-pin header: power (red wire), Rx (orange wire), Tx (yellow wire), and ground (black wire).
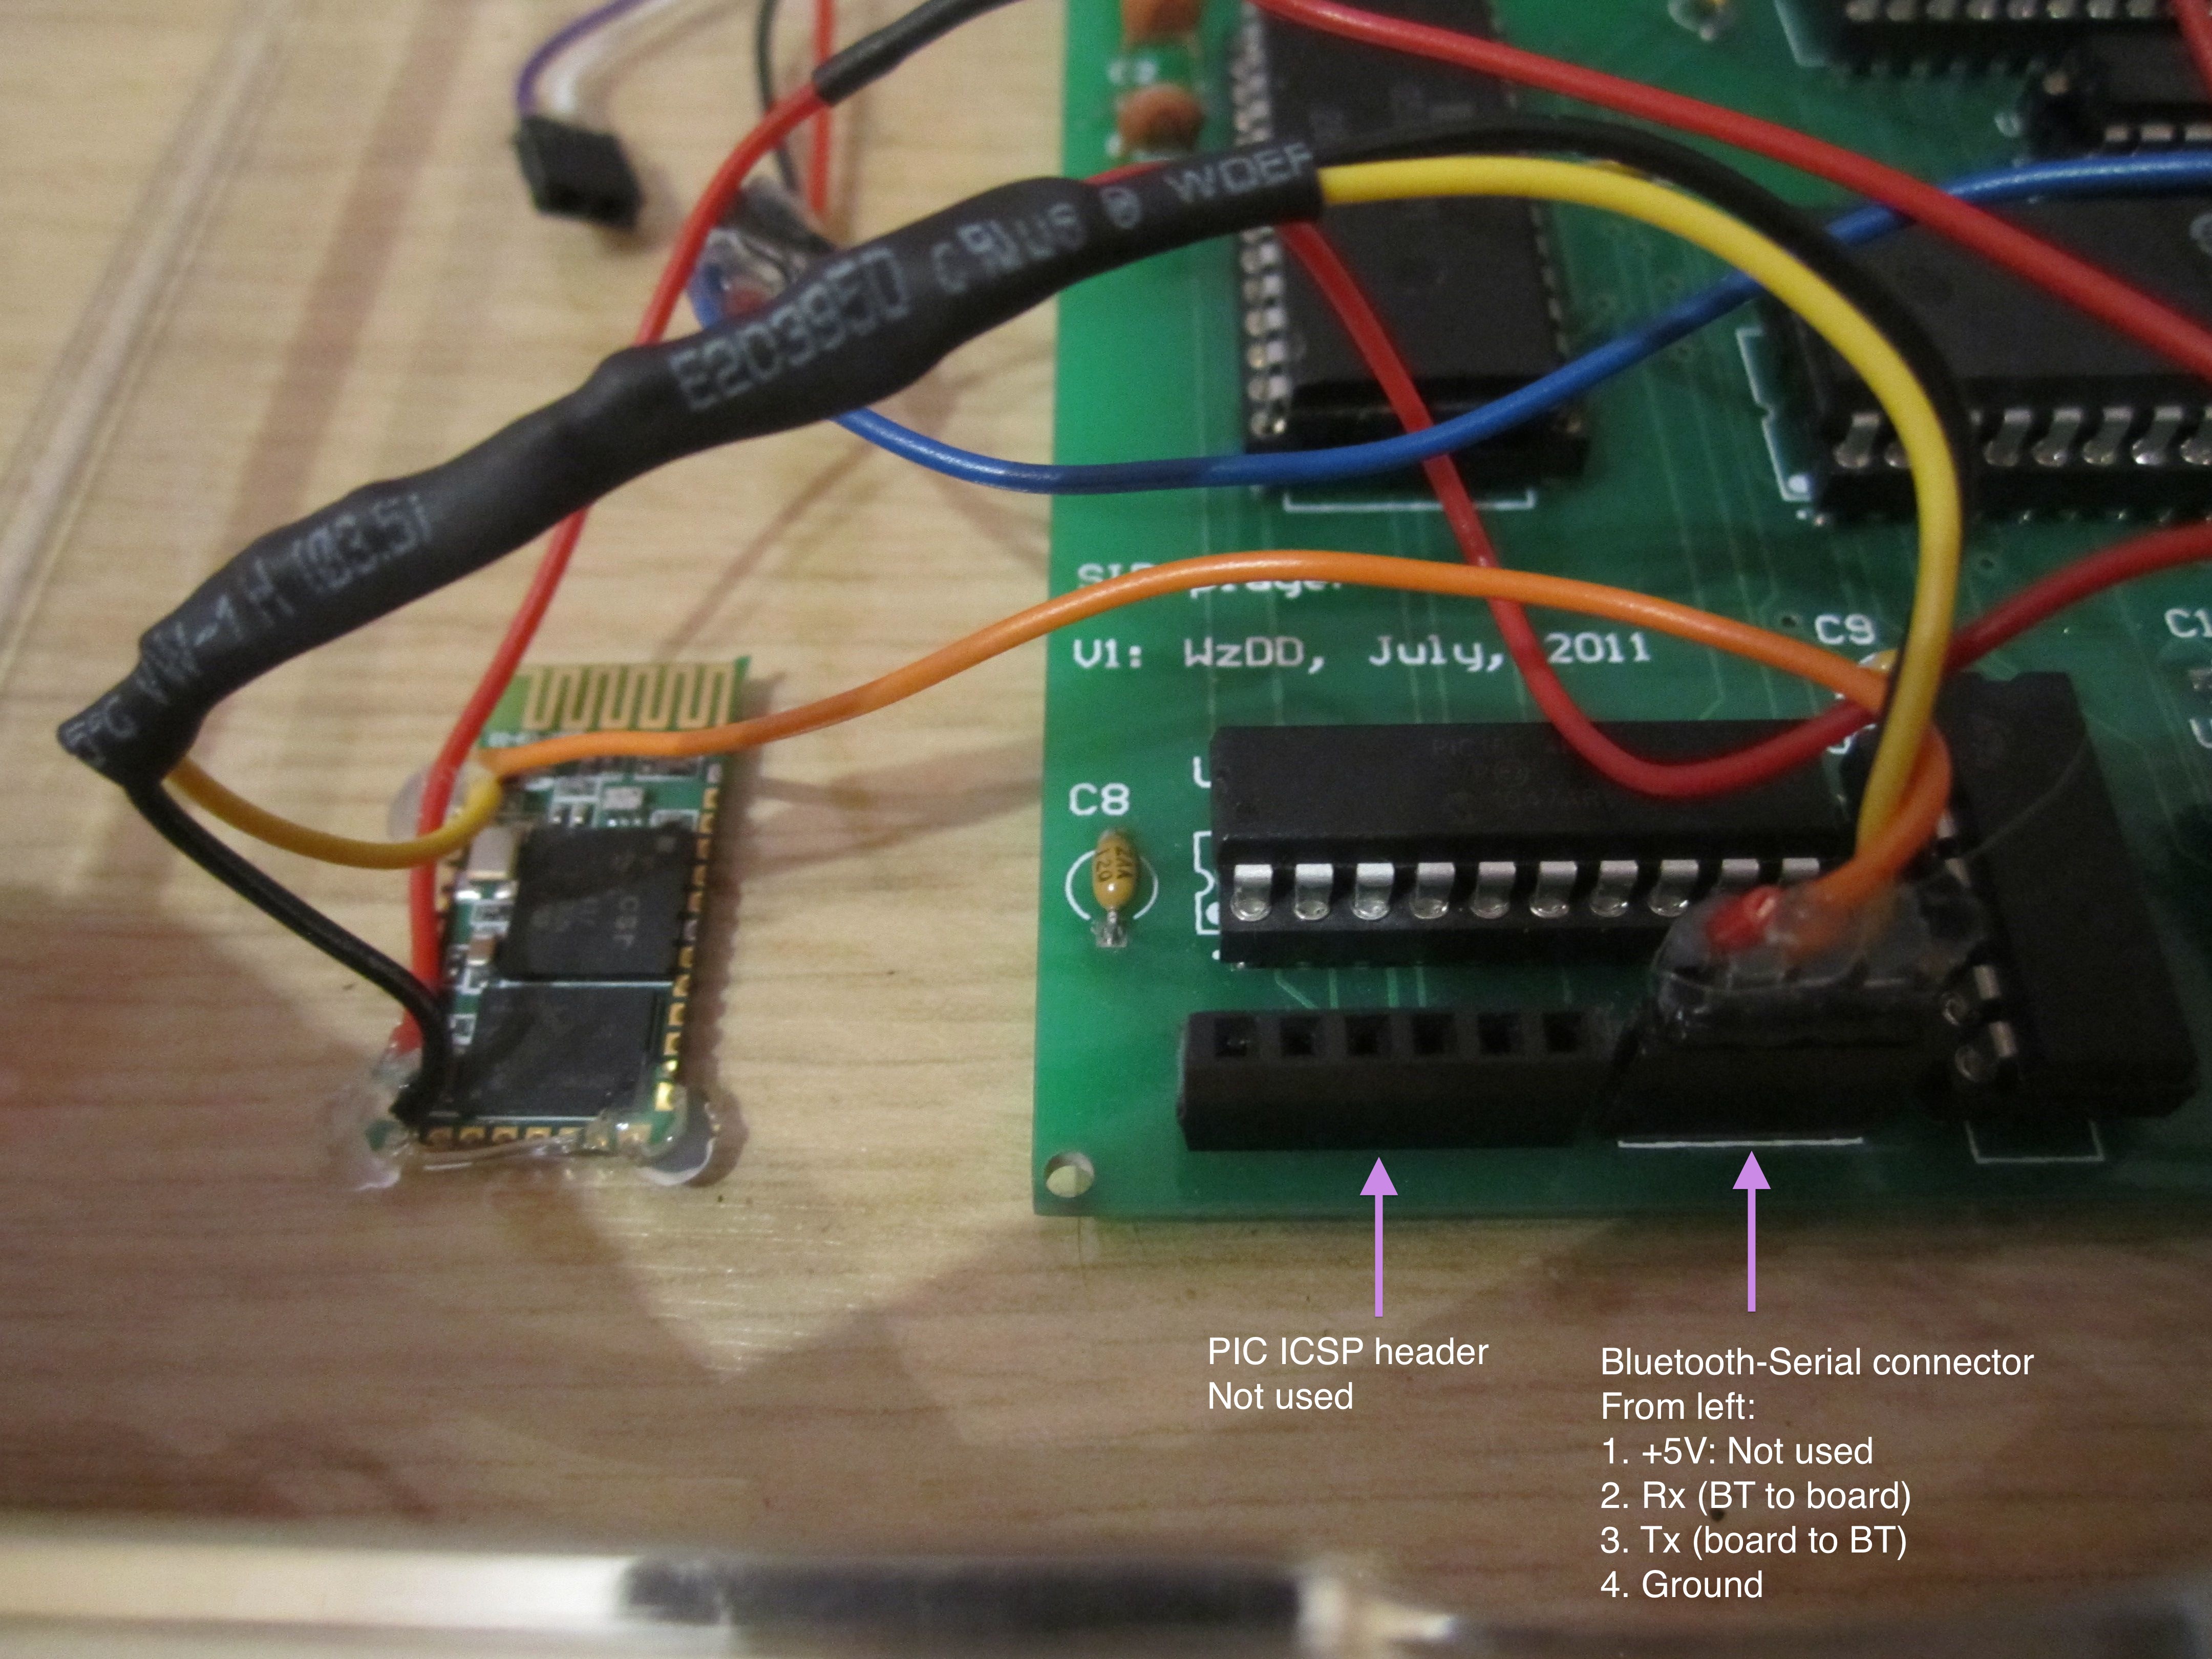
The first pin, +5v (red wire), isn't used, as the module connects directly to a +3.3v power line; the
The SID is component U8 on the circuit board, in the upper left corner. It should be installed so that the pin 1 is near the top of the board. SIDs have a small notch on one side -- if viewed from above, Pin 1 is to the left of this notch.
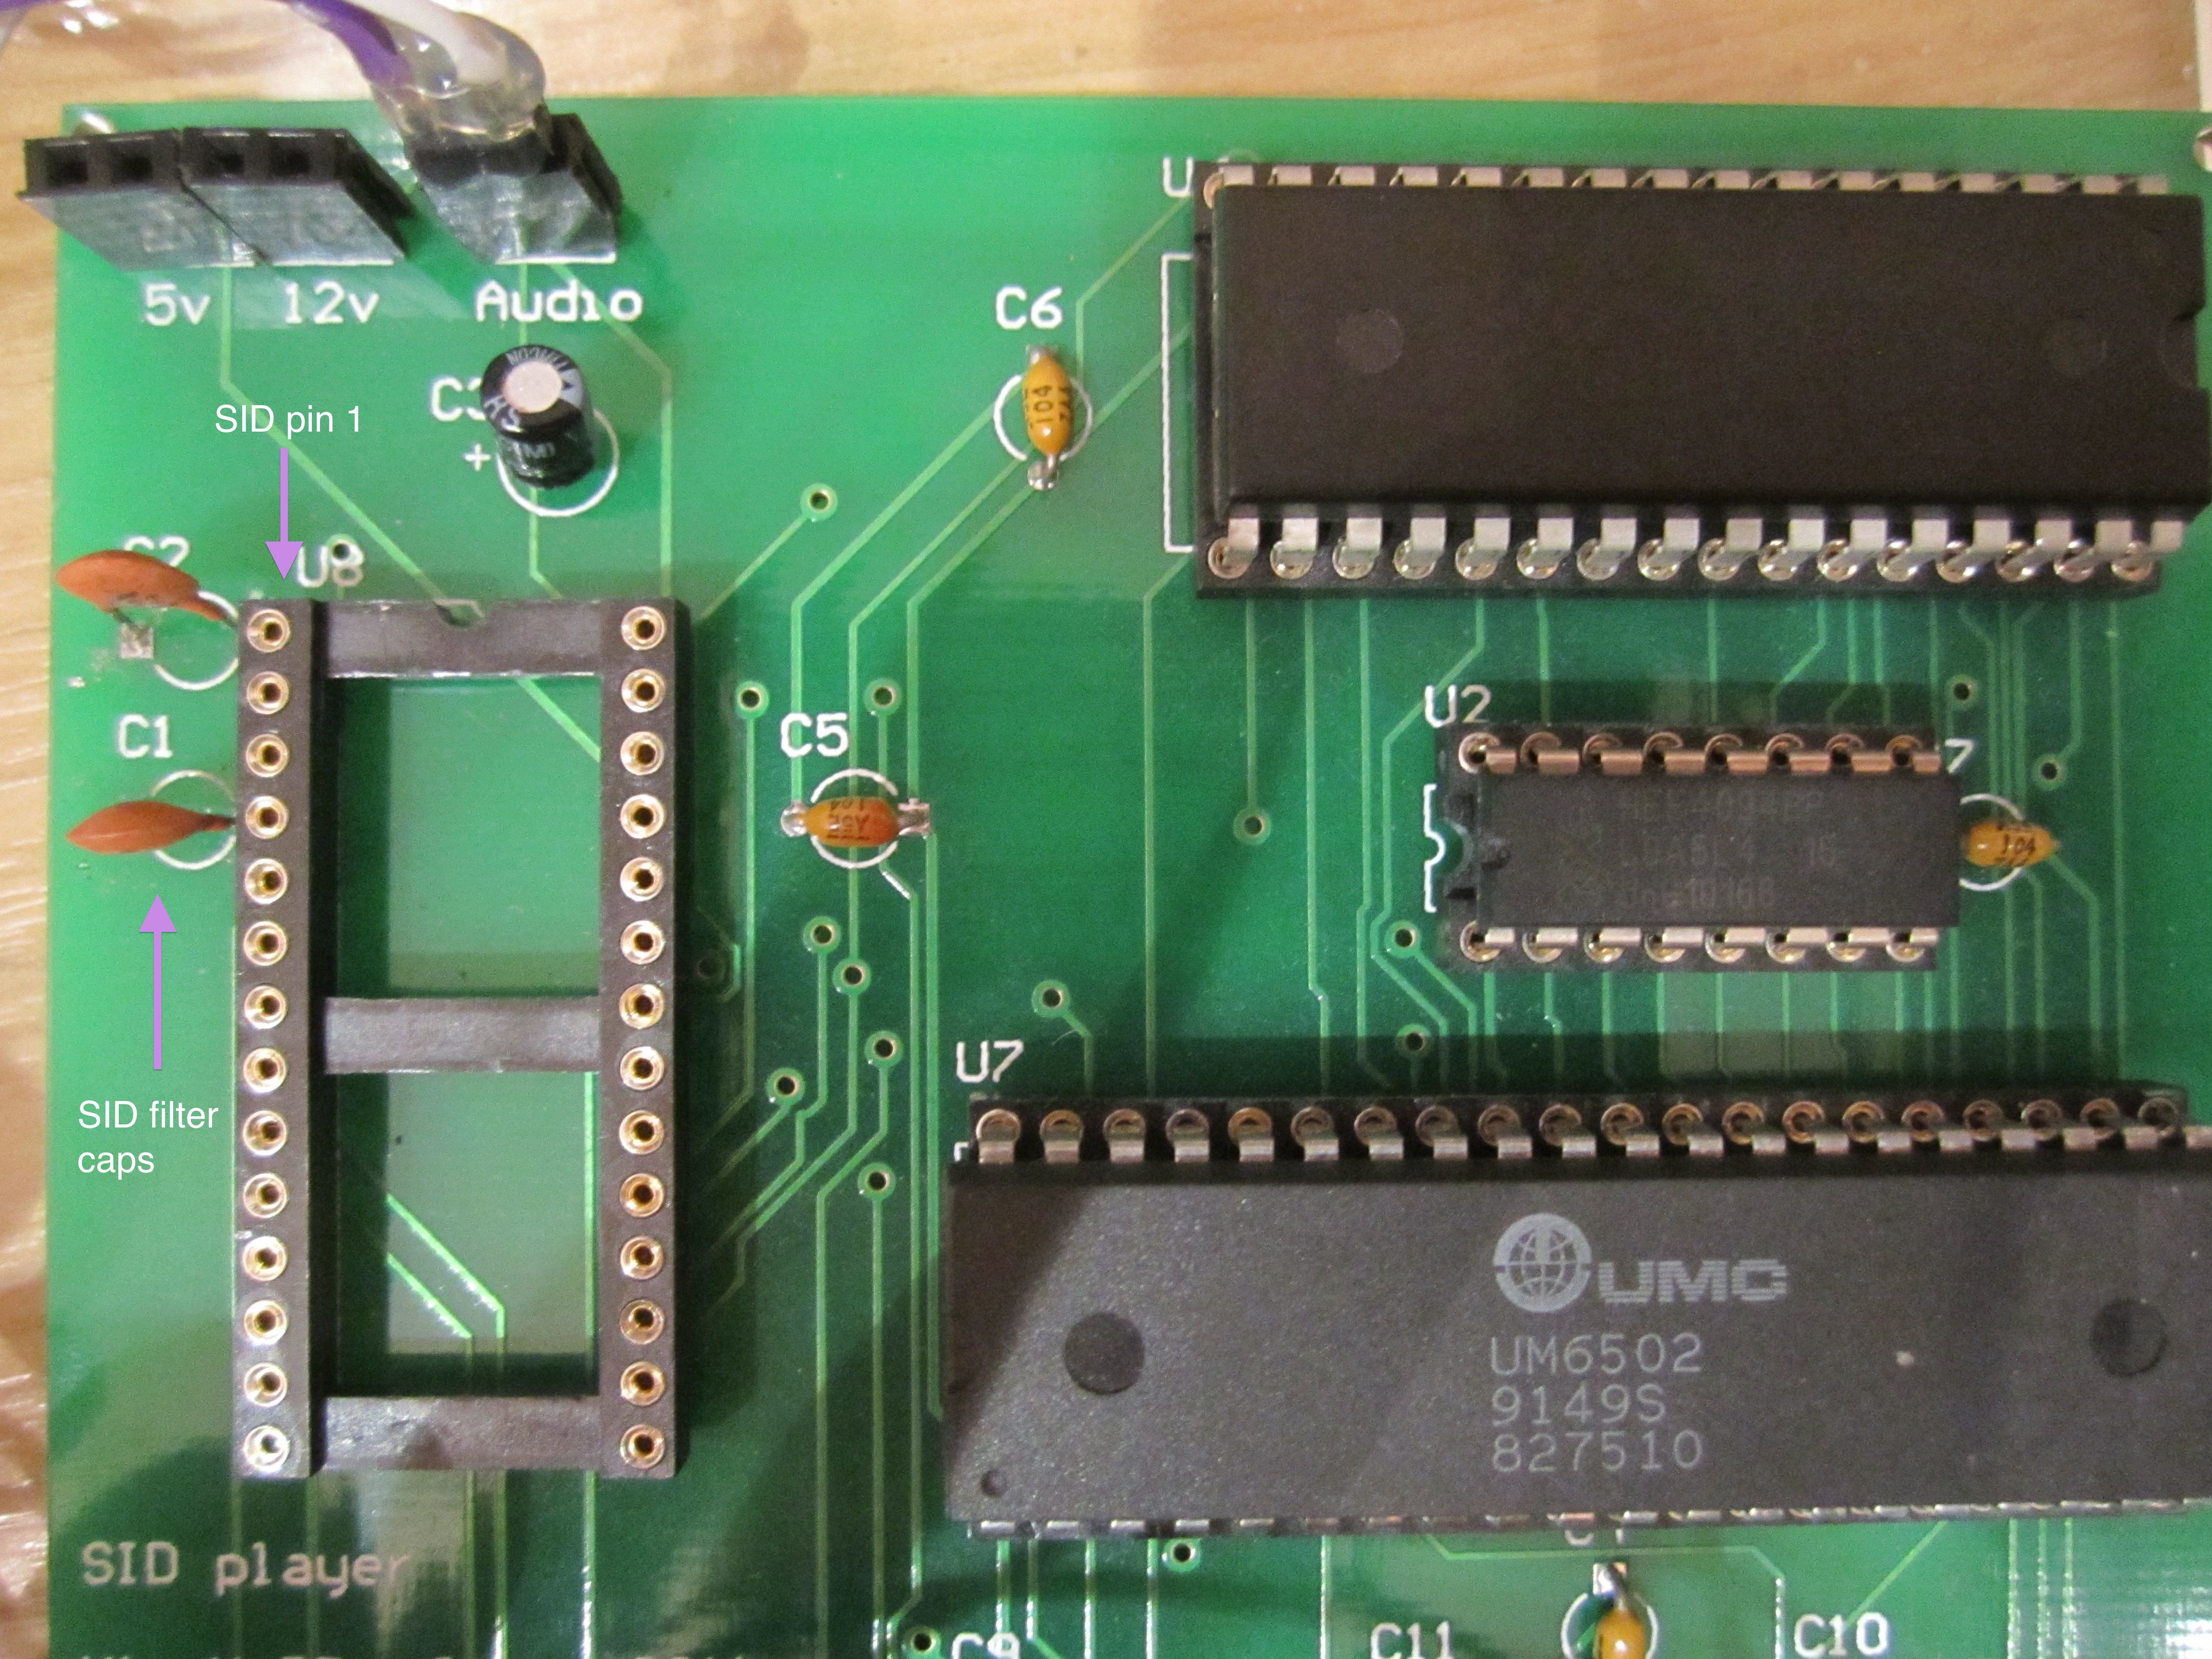
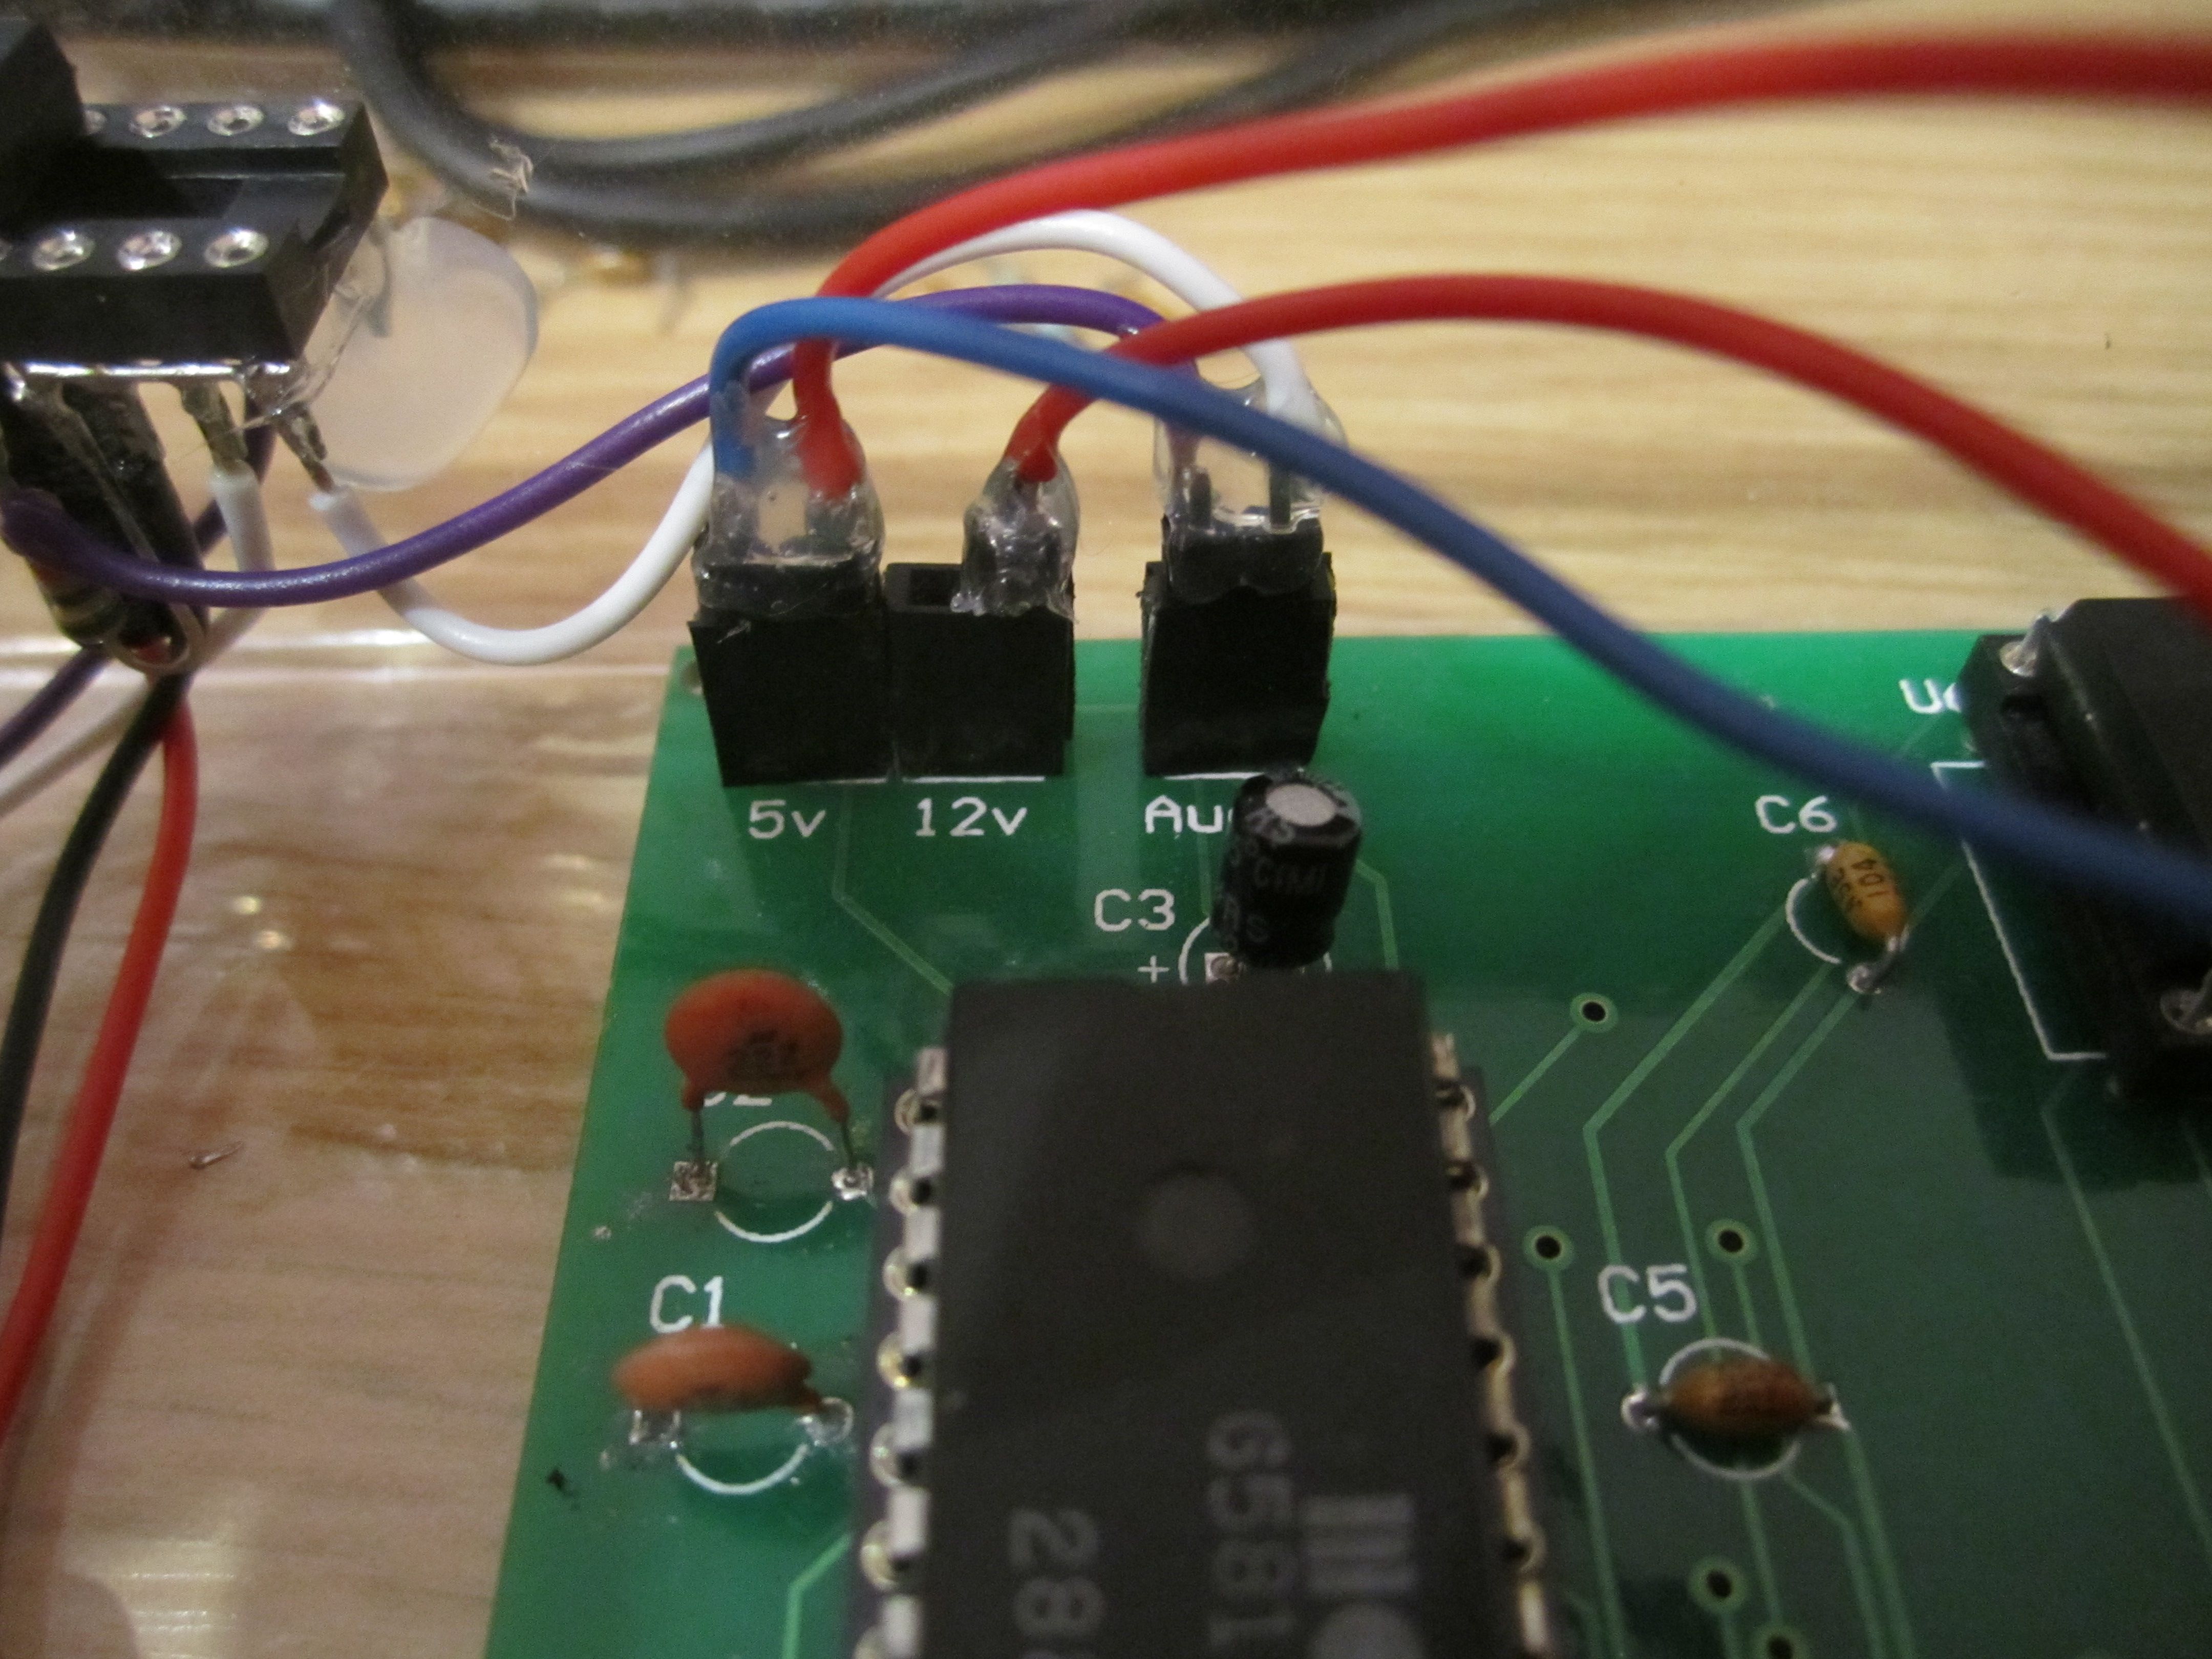
The power headers are at the top of the board. The board itself needs 5v and 12v. Note that this board only supports 6581 SIDs -- if you want to use an 8580 SID instead, you should supply the board with 9v instead.
Note the way the power connects to the board: GND first, then +5v, then another ground (which need not be connected), then +12v. The audio header is next (purple and white wires) -- puple is signal, and white is GND.
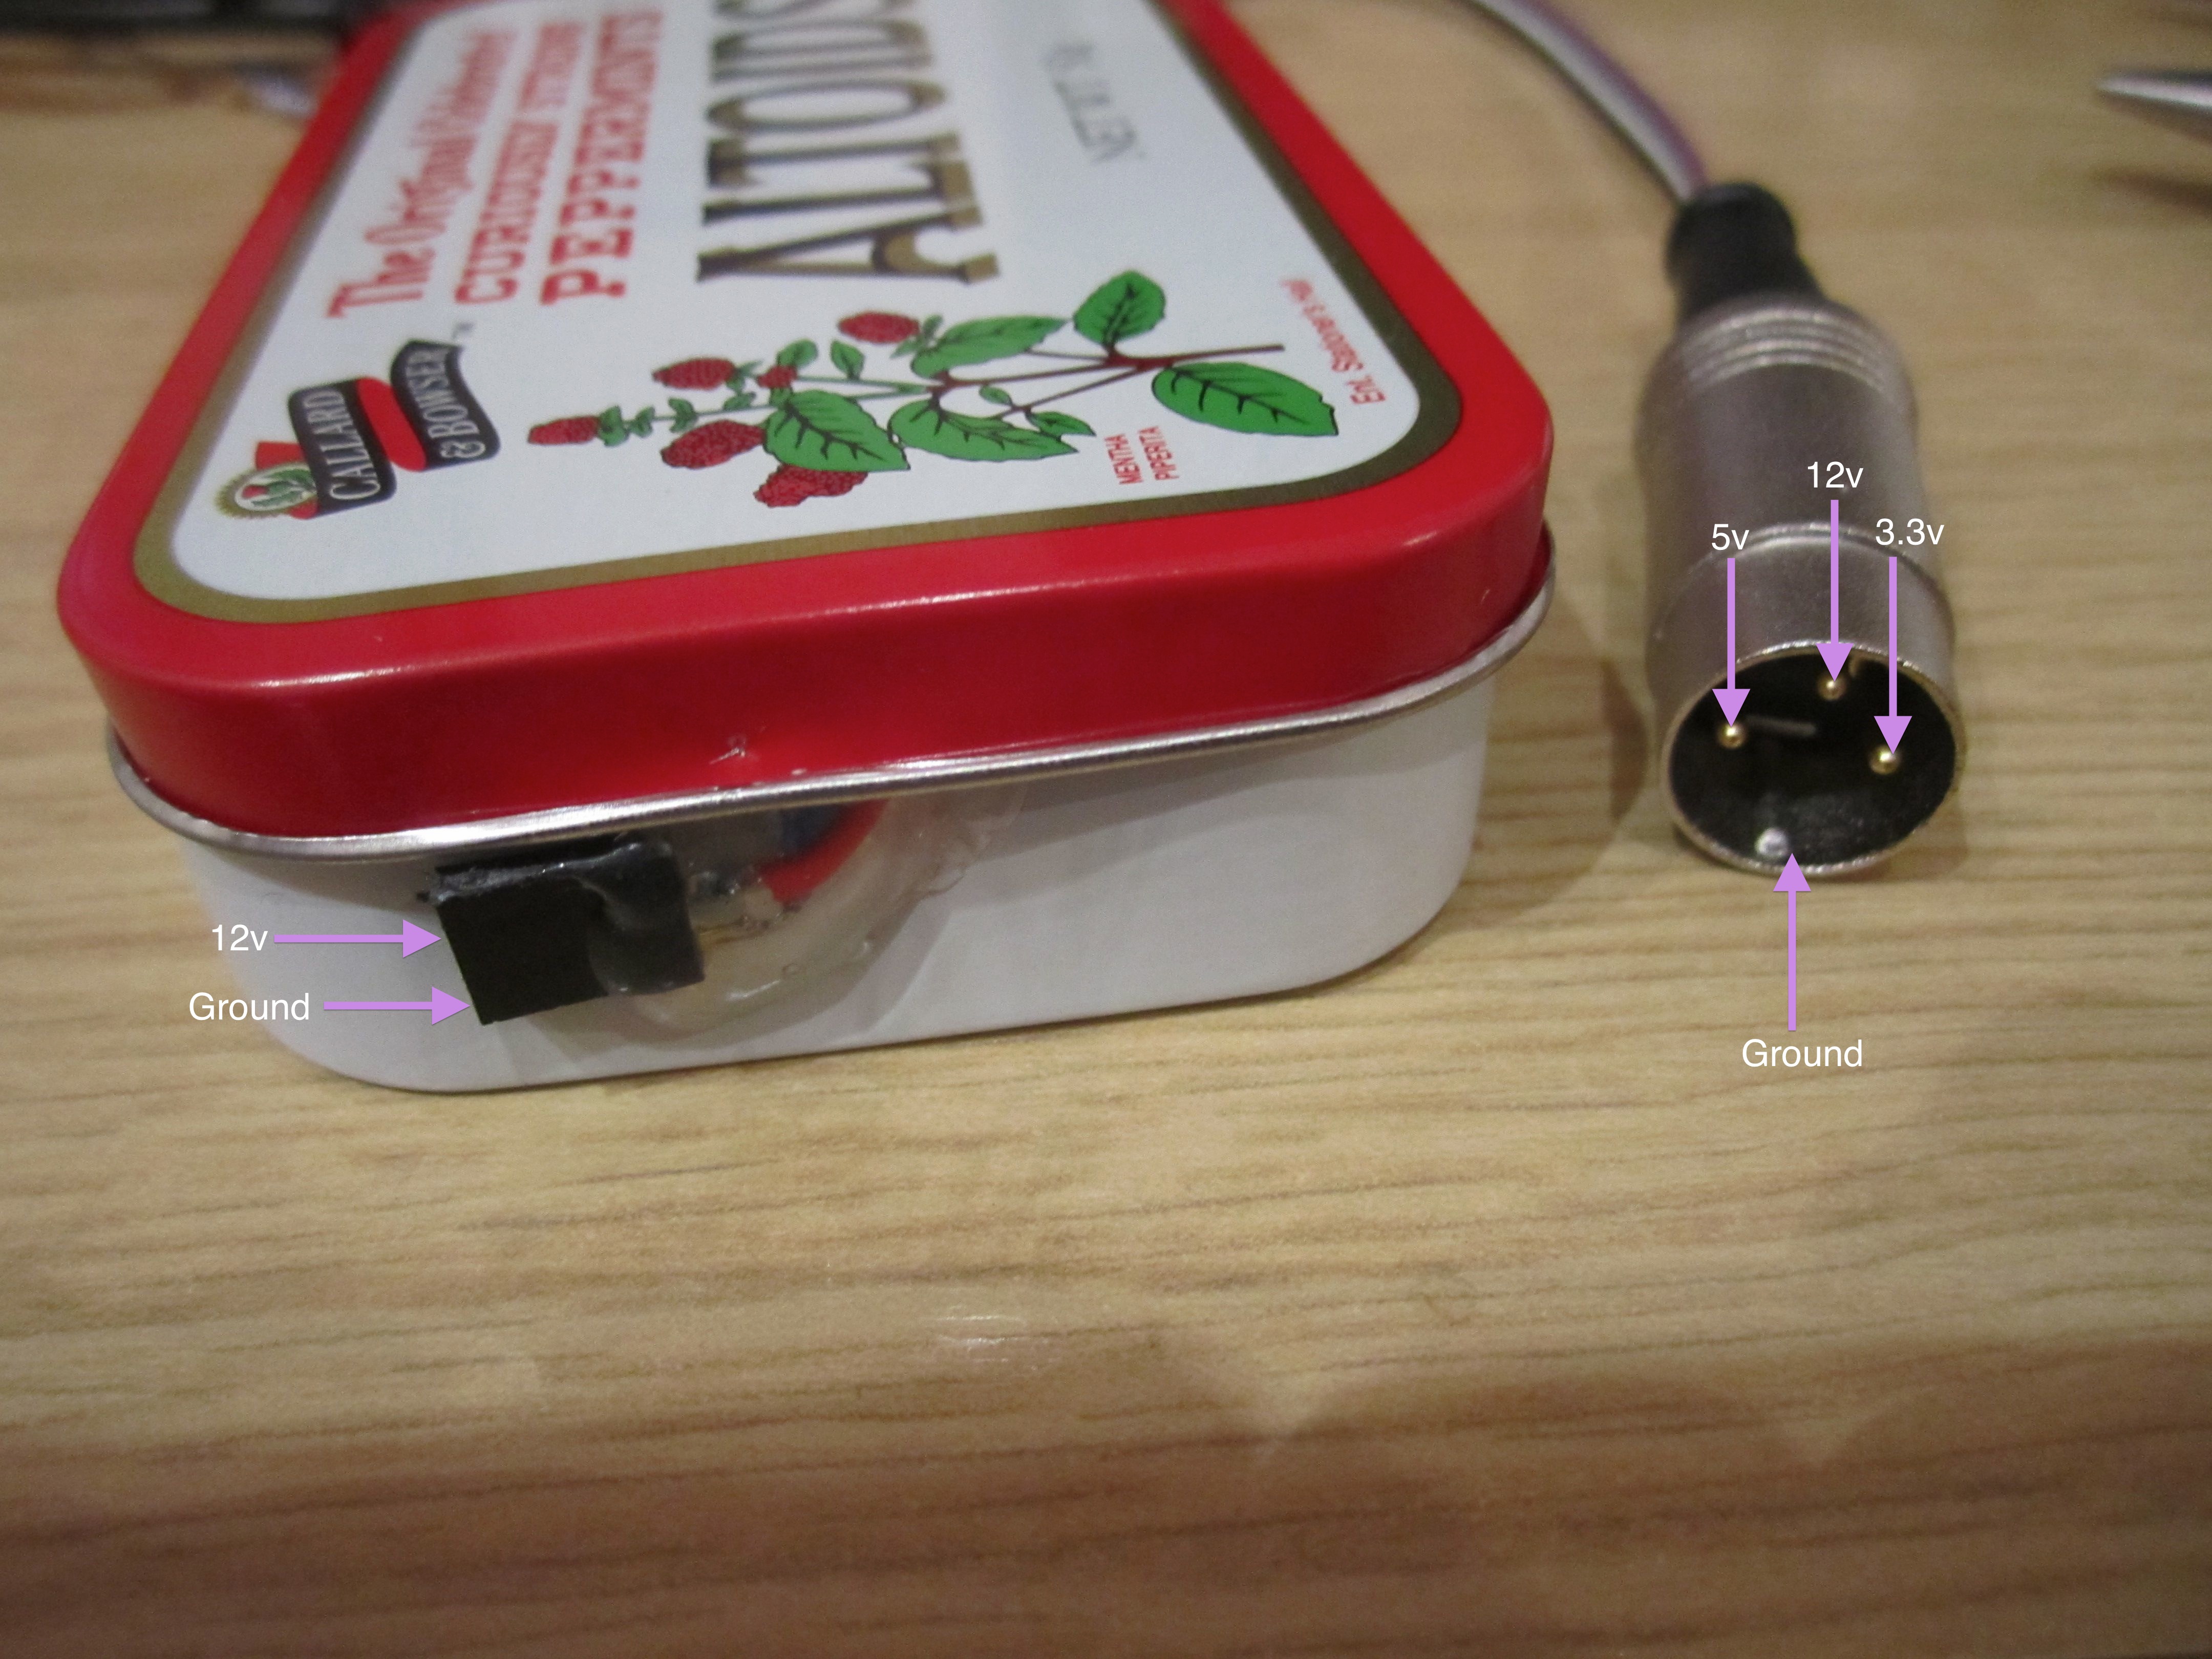
The power supply accepts 12v and outputs 3.3v, 5v, and 12v through a plug which connects to the main board. It is very important to connect the 12v power the right way around: GND goes on the lower pin (which connects to the blue wire), and +12v goes on the upper pin (which connects to the red wire).
Once you have checked the connections, plug the SID player in and turn on the power.
Pair your computer with the SID player. The player will show up as Bluetooth serial port. The Bluetooth module does not use a password (and if you have a Mac you will need to explicitly select the "no password" option). After pairing, you should get a new device in /dev (if you're using a Unix-alike), or a new COM port (if you're using Windows).
The software is a Python command-line application named Playsid. It requires Python 2.x and pyserial.
Download the software here: playsid-2012-05-12.tar.gz.
Edit the playsid.py file. At the top of the file is a line starting SERIAL=. Edit this line to reflect the new device created above.
Now test the player. Run python playsid.py goodsids/Comic_Bakery.sid. The first time you run playsid, it will start a daemon process and exit immediately. Run the same command again to upload the file to the SID and start playback. This may not work on Windows -- let me know if you are using Windows and are having problems.
Two other playsid commands:
playsid --stop: stops playback
playsid <sidfile> [number]: play tune number from the SID file. Some SID files, particularly those from games, contain more than one tune. The first tune is number 0. Other tunes may include sound effects, in-game or game-over music, and so on.
The SID player will play almost all game SIDs from the High-Voltage SID collection. It doesn't play some SIDs at all, particularly ones which were designed just for performance and not for being background to a game, as these make use of Commodore 64 features not present on the SID player. Technically speaking, it can play most PSIDs but no RSIDs. I have some ideas to fix this. If I do, it will be a software update to playsid.
Email me with any questions: wzdd.sid@lardcave.net.